
Richard began by teaching us the basic techniques, such as scoring the paper to create a neat fold that can be straight of curved. We then went on to look at tearing and how to attach pieces of the paper together by using tabs and slots. We were then left to our own devices and told to experiment in a number of different ways.
The only rules we had to follow were:
- made from one a5 sheet of paper
- paper could be removed from the sheet, but not added from another
- it must be able to unfold back into a flat(ish) a5 piece of paper
- no glue allowed
The first thing I managed to make can be seen below...
 I made this by scoring the paper in a curved formation, this makes the paper fold easily and have a sharp, clean edge. For my first attempt I am actually pretty impressed :] After this I moved on to actually cutting into the paper...
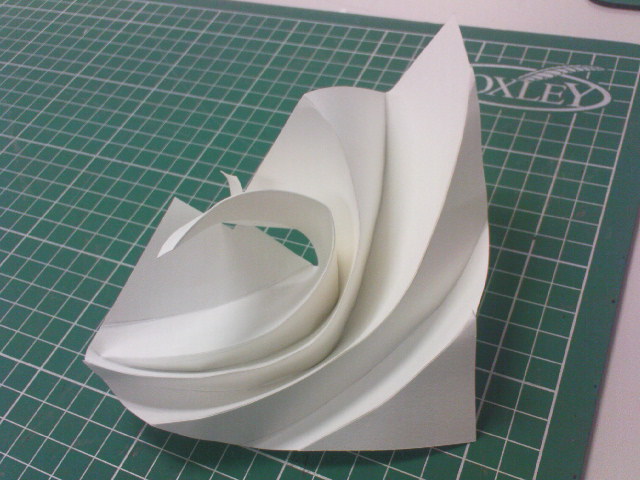
Here I have cut into the paper and used the tab and slot technique to fix the loose ends into place. From this angle this piece is not very exciting...

However, when photographed from the right angle its actually pretty intricate and interesting. On a black background with the right lighting this could look really effective.

I took this once I got home, I decided to take the photo on a deep blue carpet, mainly due to the lack of a black surface, however with the lighting I think it works pretty well. This definitely needs reshooting on a black background to show the true contrast. It would also benefit on a grey background as well.
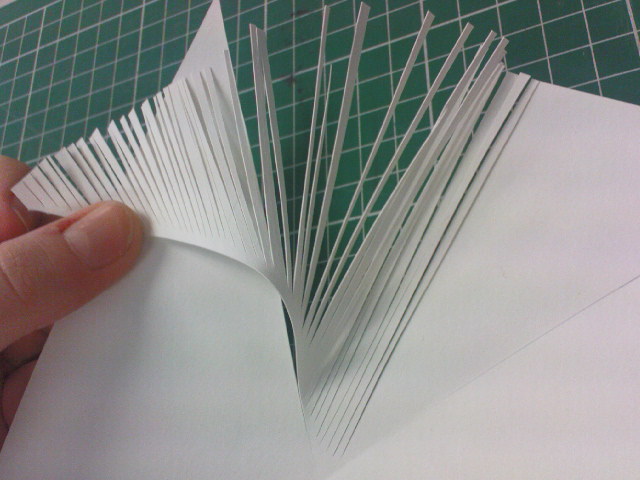
Anywaaaay back to the workshop, I then tried cutting finely into the paper and seeing what effects i could create. Just by bending these over I created some pretty interesting effects.
Which can be seen below...


The is the outcome of leaving a curved spine down the centre of a piece of paper and slicing small slithers on one side and thicker slithers on the other. This has then been twisted together and held into place using the slot and tab technique. This means that you get a spiral effect with the long, thin slithers and also mirrored on the top with the thick, short slithers. The second image of the piece on the cutting mat is really successful.
I then took photos when I got home, again using the dark blue carpet as my background. The first one shows the piece on the floor with no light source. In the second image I had lighting from a torch to try and create an interesting effect. Again, this could benefit from being photographed on a black or grey background.


After a day of paper folding, scoring, slicing and slotting, I'm rather looking forwards to our next session with Richard Sweeney :]
No comments:
Post a Comment